
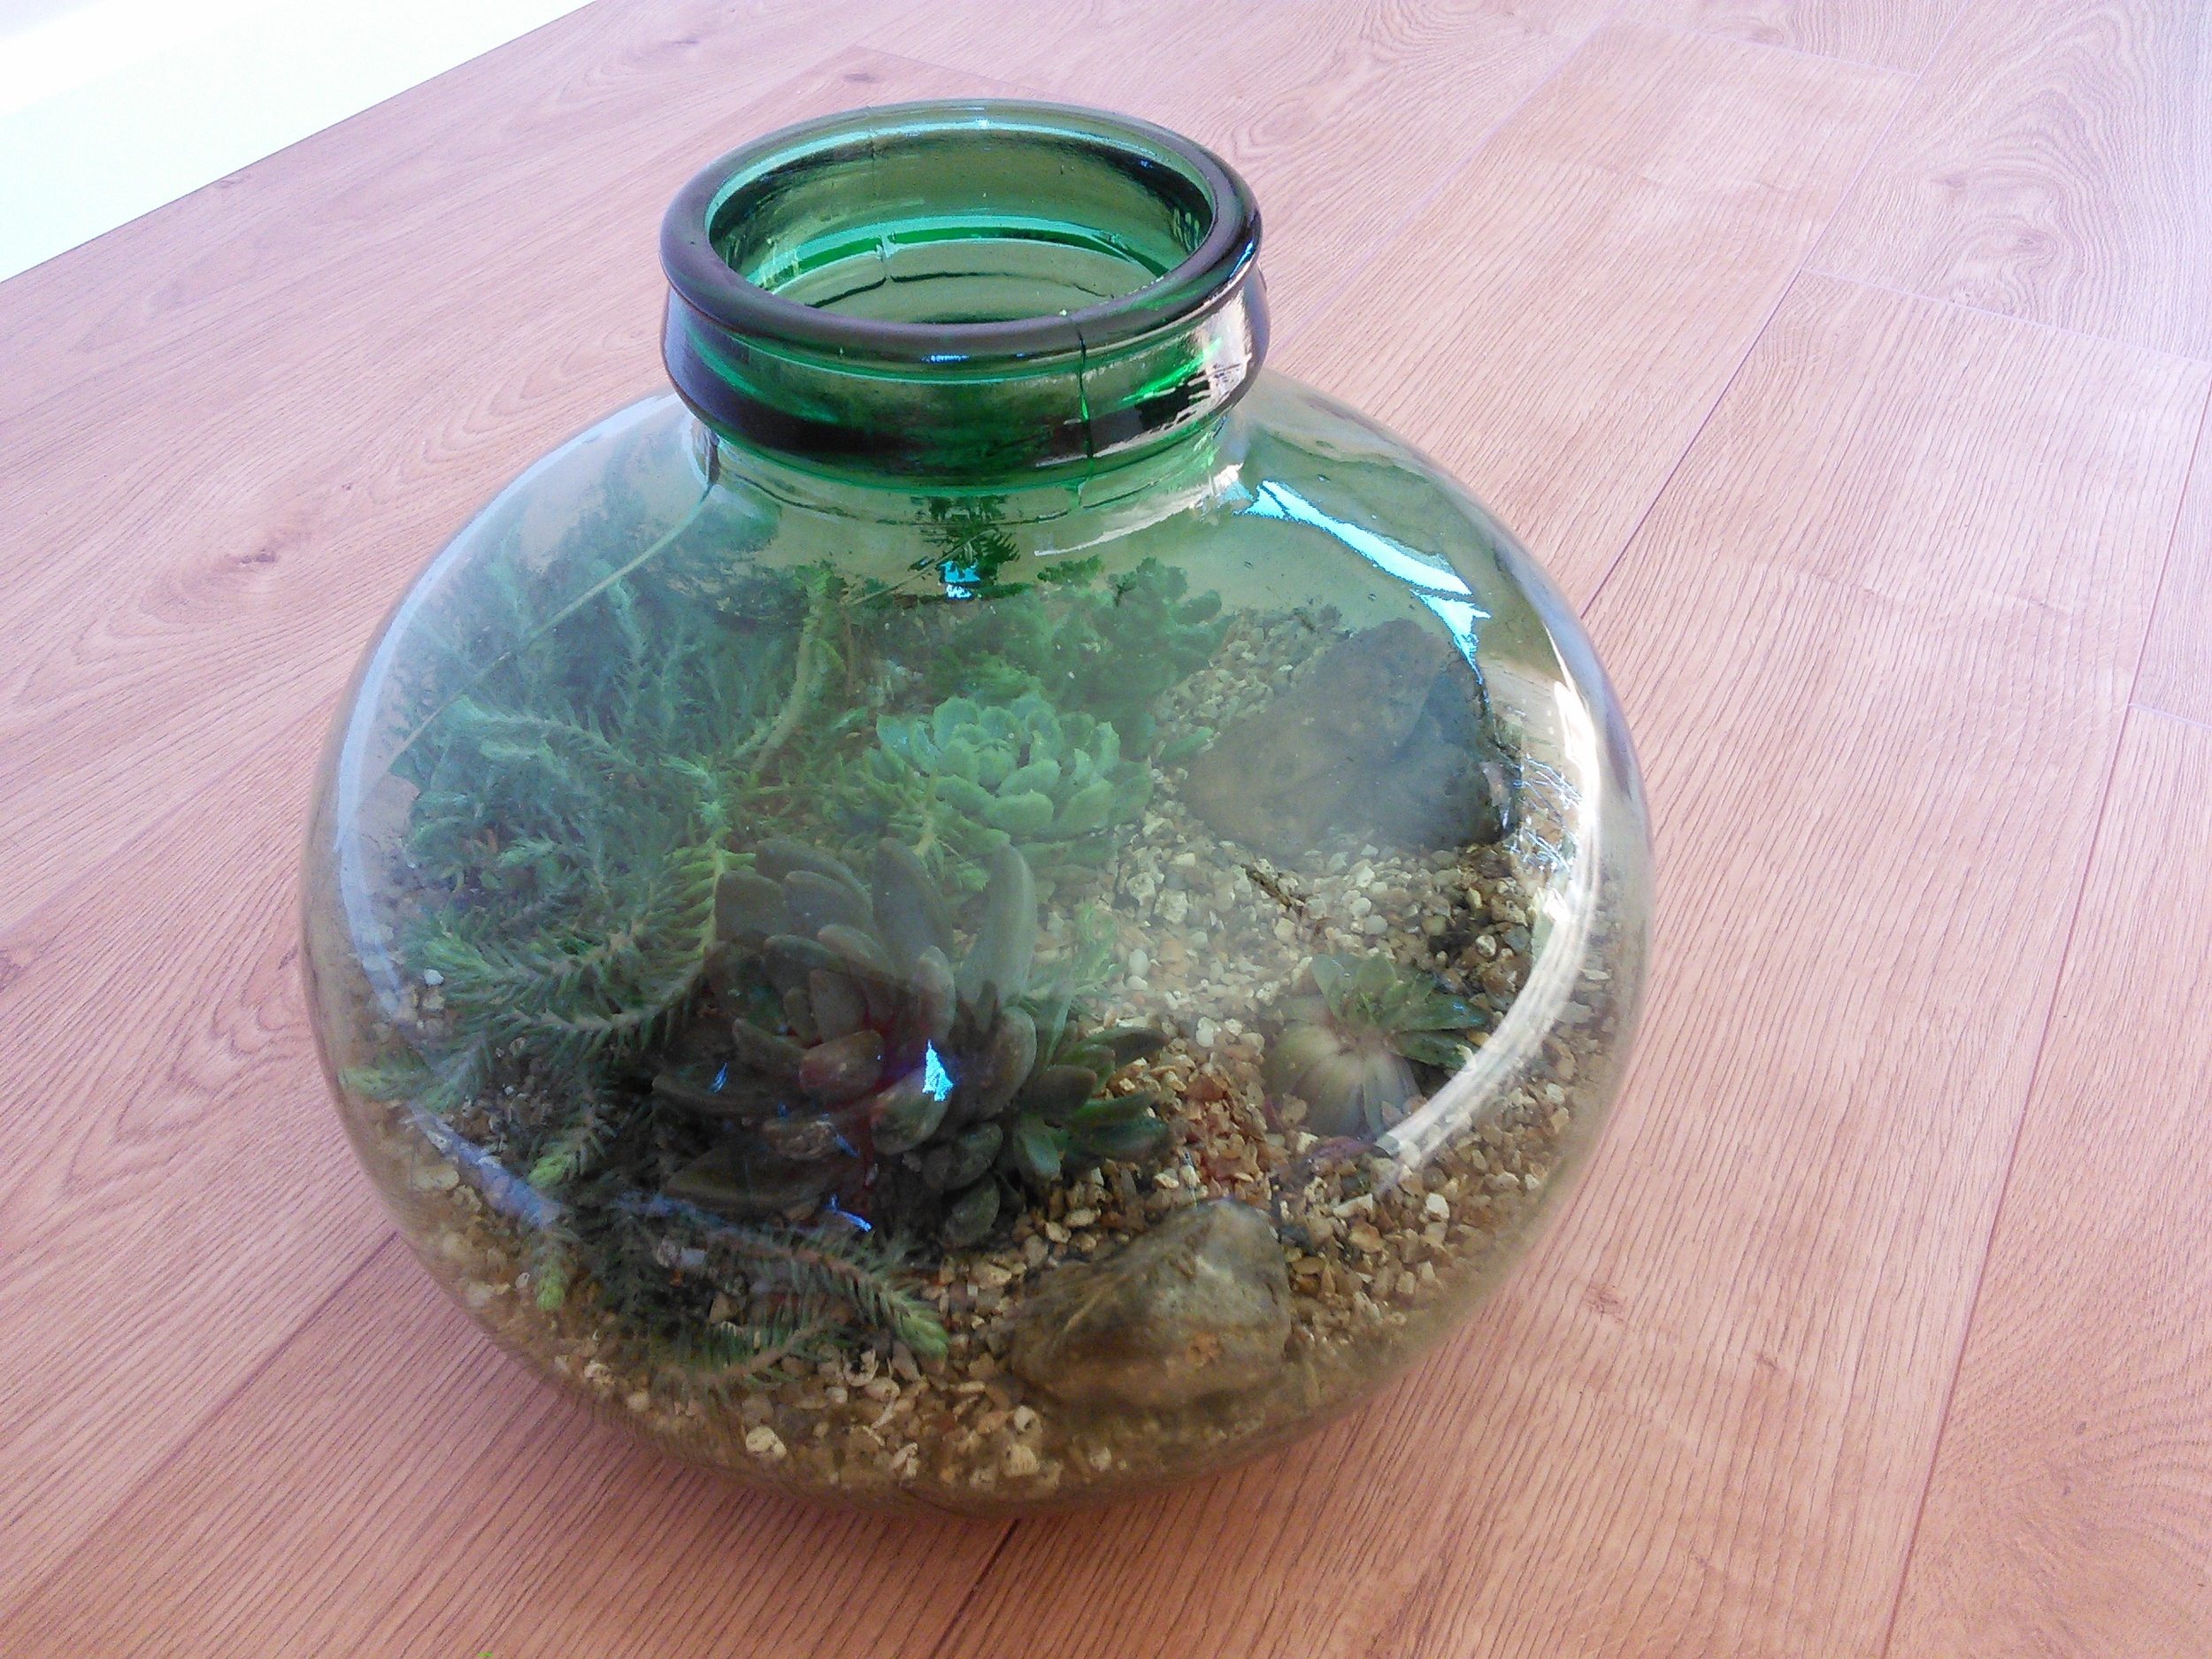

Succulents bottle garden
Bottle gardens – first popular in the 1960s and 1970s – are ripe for a comeback. Especially for those habitual houseplant killers, such as myself. The sealed or semi-sealed nature of a bottle garden makes it an excellent low-maintenance way to bring a little greenery into your home.
Don’t believe me? There’s a chap who last watered his bottle garden in 1972 and its still going strong. How’s that for low maintenance!
A fully sealed bottle garden can become its own little ecosystem where moisture exuded by the plants collects on the walls of the bottle and rains back down onto your plants. This happens to a lesser extent with unsealed bottle gardens, but still enough to stretch out the time between required waterings. As a forgetful plant-guardian, I need that extra leeway.
What do you need?

Materials and equipment
- A bottle
- Grit, gravel or pebbles for drainage
- Compost
- Plants
- Decorative elements: gravel, stones, garden gnomes
- Tools
More on all of these items coming up
Step 1: Get a bottle
Finding the right kind of bottle was a struggle at first. I had in mind a large near-spherical bottle with a neck wide enough to give good access angles on all locations inside. Knowing what to search for was half the battle. I got my best results from: ‘viresa’, ‘carboy’, and ‘terrarium’.
No one seems to be making this style of bottle any more. Modern glass carboys for brewers tend to be cylindrical and have a pretty narrow neck. I’ve seen pictures of a bottle garden in one of these tipped on its side (ship-in-bottle style), but I’d consider that some advanced-level bottle-gardening that I am not yet ready for.
eBay, or another secondhand shopping arena, is your best bet for bottle like the ones in my pictures. Because it’s a hefty chunk of glass and because it’s individuals doing the selling, most of these bottles are collection only. There were three within reasonable driving distance of me on the one day I looked; I haven’t looked deep enough to tell whether that was luck or the norm.
After a flurry of eBay activity (my first in many years) I came away with 100% more bottle than I intended and the realisation that eBay is a bad place for competitive people to shop. Dan oversaw my ritual logout and removal of my eBay account with only a small amount of mockery. The fact is: I am too competitive to be trusted with ongoing eBay access.
Off we gallivanted around Hertfordshire to retrieve my two glass bottles.

Are we nearly there yet?
Step 2: To the garden centre!
The soil, gravel, and plants were all acquired at the first garden centre we passed on the way back from collecting bottles.
I can’t really offer much in the way of advice about what type of plants, soil, and gravel to go for, so I shall refer you to the fount of all knowledge (in this case, the internet) for more information.

Though my ‘Complete Crafts’ book published in 1977 does offer this advice
The key is that all the plants you get should like the same kind of conditions, especially with regard to watering/humidity.
Most of the more liquid-loving bedding plants available at this time of year (August, for those of you reading this in the future. Hello future humans, btw, do we have hoverboards yet?) were too large to be easily planted into a bottle garden. The fount of all knowledge (in this case, my mum) tells me that May is a good time for getting bedding plants the right sort of size and temperament for a lusher bottle garden.
Stymied in my efforts to find appropriate leafy plants, I stumbled upon a tray of succulents. While I’d like to tell you the varieties I chose and the fine design principles I used to choose them, I’ve already discarded the labels and my selection logic went something like this: “I’ll have one of each type, hmmm, five is probably enough, that one’s name sounds like an STD, back it goes”.
Advantage of succulents – they need even less water. My neglectful ways will be rewarded.
For soil and gravel, seek other sources if you want a authoritative advice. I got multi-purpose compost, because I also needed it for other purposes, and a gold-coloured decorative grit that i was happy to use for drainage as well as decoration.
Step 3: Right tools for the job
The main tools I used to make my bottle garden were an old fork bound to a long stick – for digging and poking, a long cardboard tube taken from the inside of a roll of wrapping paper – for pouring things down and directing where they landed, and a trowel – for tipping stuff into the end of the tube.
Step 4: Design
Consider the layout of your bottle garden.

Any excuse to break out the felt tip pens.
Here are some of the things I considered:
- Did I want it to look interesting from all sides or will it be more like a tableau with a foreground and background?
I went for a definite front and back. I knew that I would have one side always facing out from the wall and planned accordingly. - Evenly spacing the plants or clustering them for a more random effect?
With my neat-freak, organiser tendencies, I knew I ran the risk of just plopping my plants in an even spacing like the pips on the 5-face of a die. With this in mind I designed a layout that was ‘heavier’ at the back leaving space at the front to see in to all of the plants. - Extra decorative elements?
My back heavy design left it a little bare at the front. Adding more plants didn’t seem like the thing to do, but a few larger stones would give a nice contrast to the greenery and add a bit of interest.
I sourced the decorative elements from under the bottom of the fence, where stones turned over in our notoriously rocky garden get slung. There were plenty the right size and three with colours that complemented the decorative gravel I’d chosen. - Size and shapes of the plants.
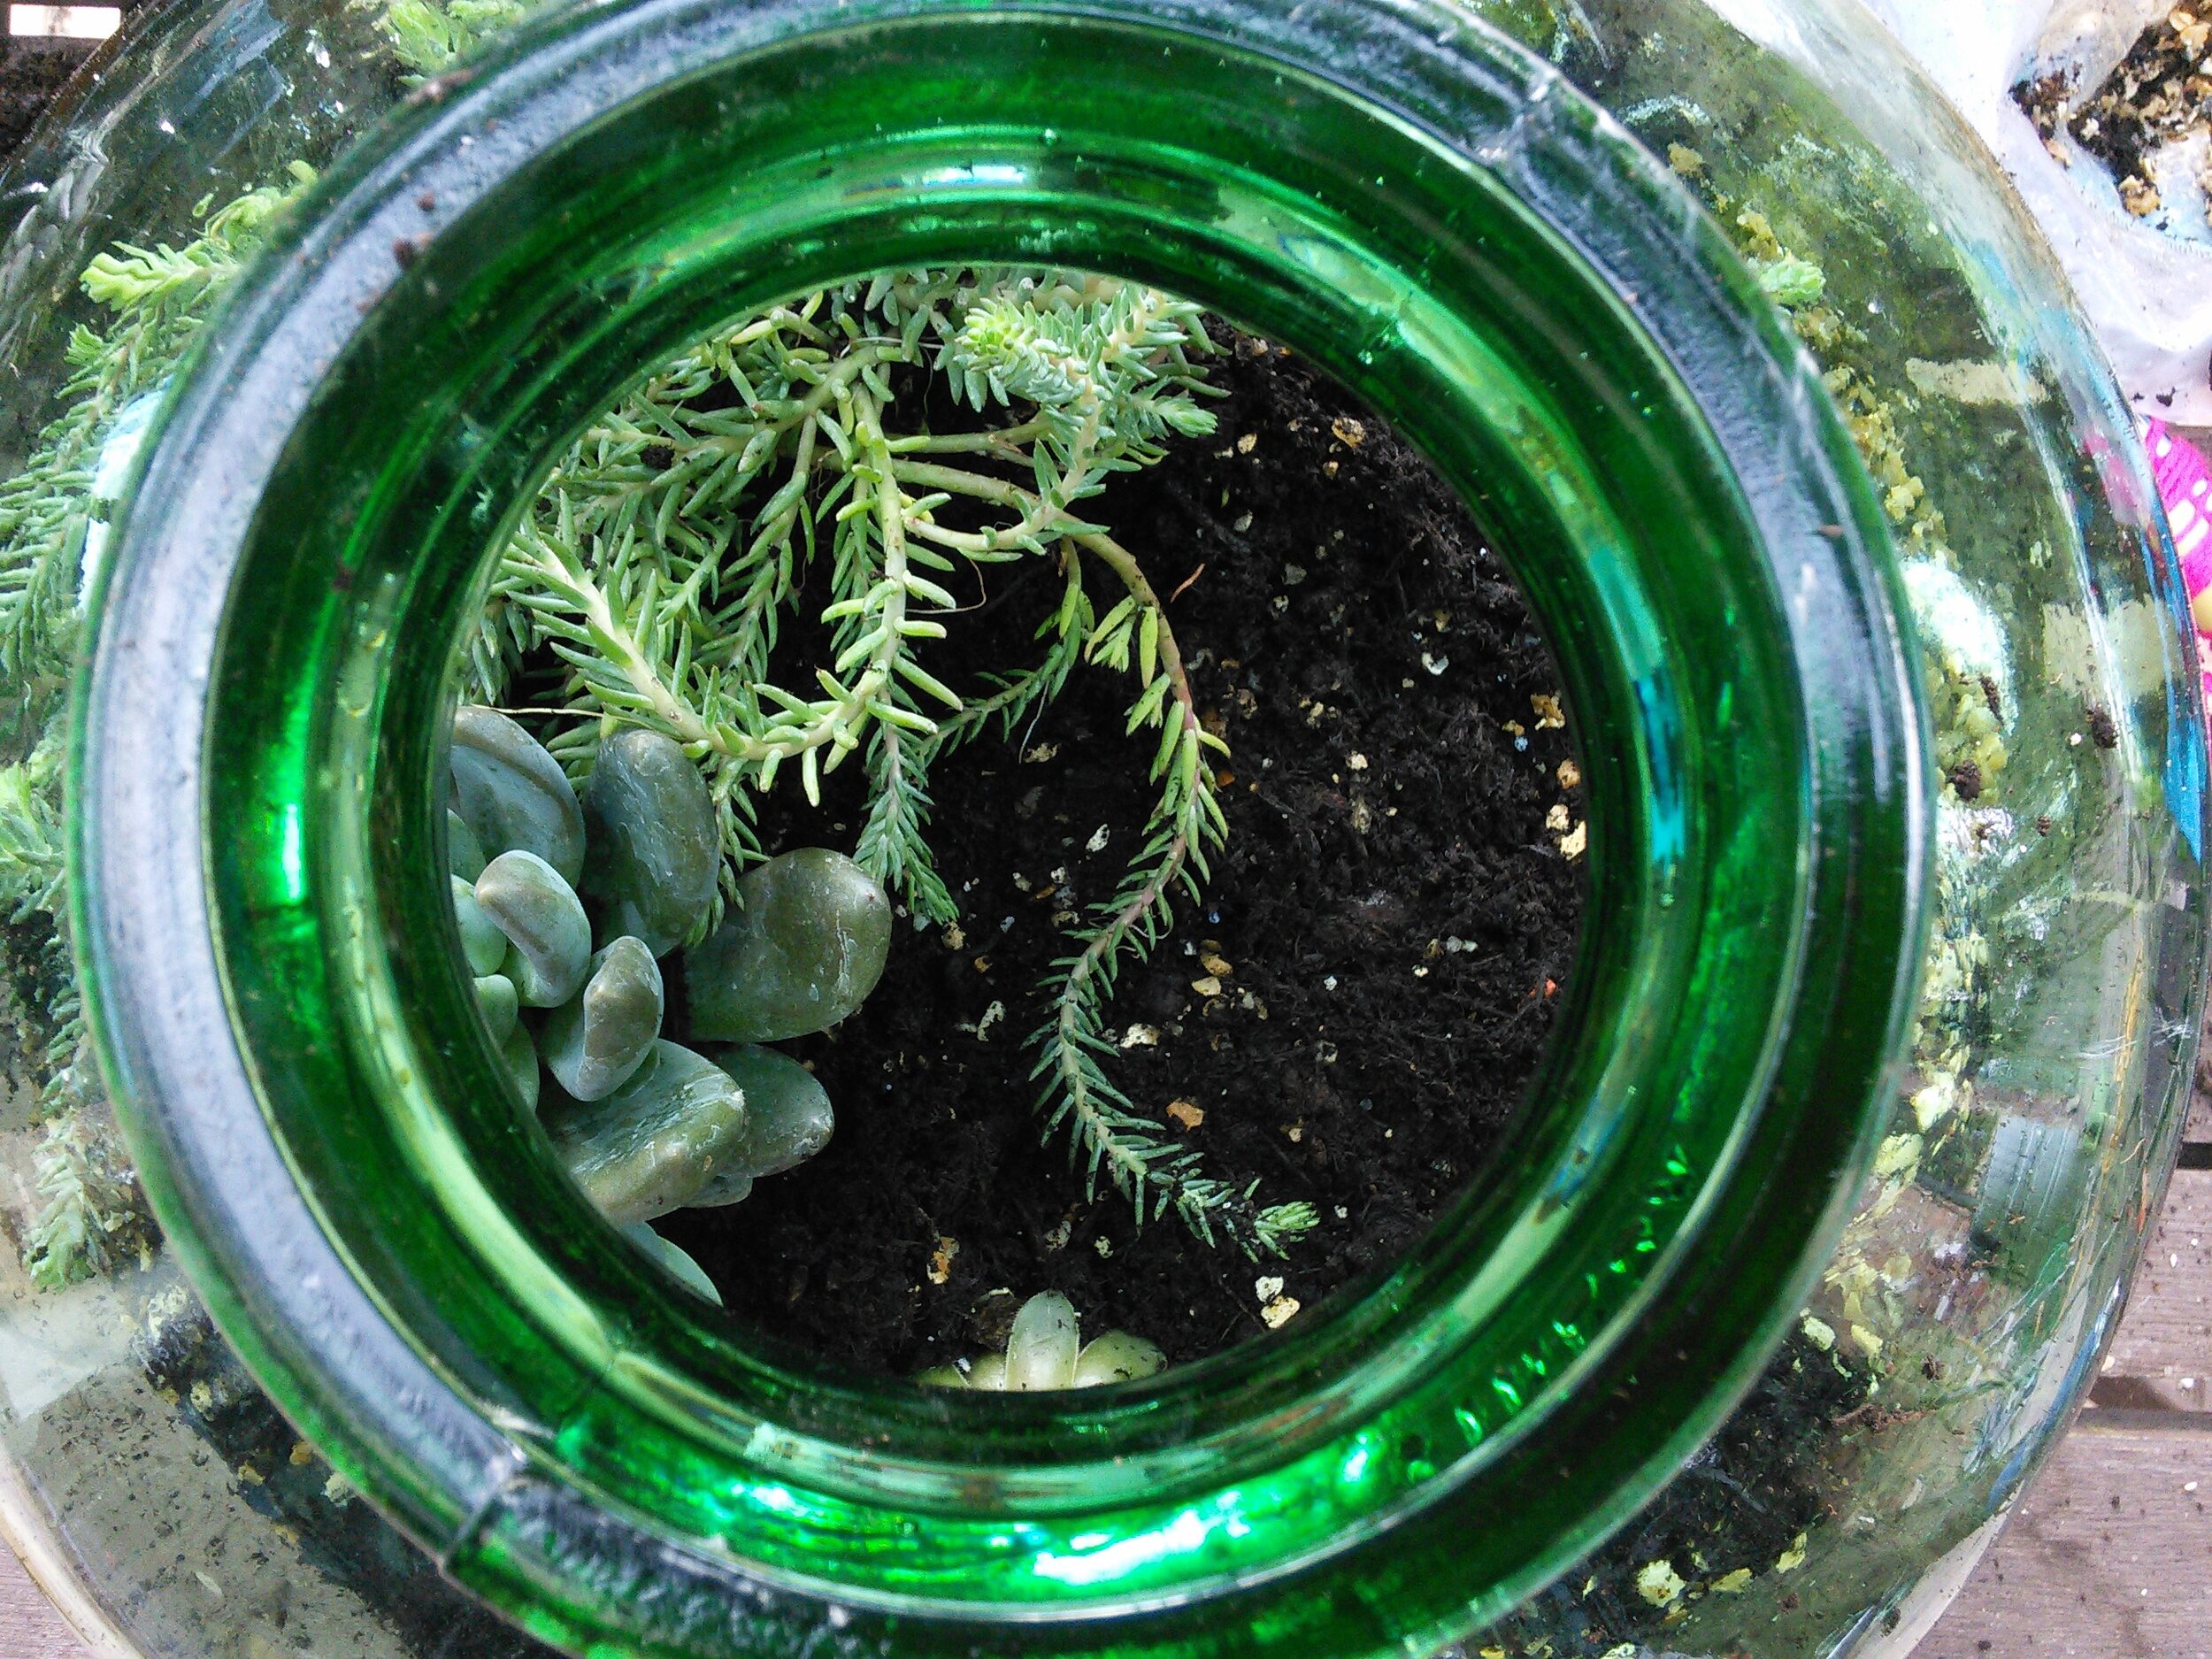
I used a low spreading plant at the back as my backdrop. The two taller plants came next acting as brackets around the sides of the design. Just off-centre I put the largest of the low succulents. The smallest I put right to the front to lead the eye in and be the first focal point. In the empty spaces I put the larger stones. To avoid making the design too balanced and static, I had two groups of stones: one containing only one stone and the other containing two stones. I also ensured that the heights of the two stone groups differed slightly.
The colour and leaf shape contrasts of this design seemed to fall out perfectly without me having to think about it, but had there been a cluster of bulbous leaves or a cluster of darker greens, I would have considered whether to mix things up for more variation in each area.
I realise it’s a bit daft to put design after getting the plants, but that’s how I rolled. Feel free to put in much more care and consideration than I did.
Step 5: Create your garden
It puts the lotion on its leaves or else it gets the spray again.
- Wash and clean your bottle. (Watch out, these suckers are heavy and their difficult to wield when they’re sloshing with liquid.) Best to use washing up liquid or some other mild detergent to get rid of any nasties.
- Add a drainage layer. You don’t want soil right at the bottom. Water pooling their would cause it to get moldy or fungussy or generally unpleasant. Put a nice thick layer of gravel at the bottom. Some articles recommend putting a layer of charcoal next to further improve bottle garden hygiene. I didn’t do this – let’s see if it comes back to bite me on the arse.
I just trowelled in a load of my grit and shook the bottle around gently to level the grit. - Add a soil layer. The stuff your plants grow in = key ingredient. Because I used succulents as my plants of choice, I mixed in some solid handfuls of grit with the soil before I tipped it in to give them even more drainage.
A little more finesse was required for this layer. I used my cardboard tube to ensure that the soil/grit mix was evenly distributed across the bottle, pointing the end of the tube at the place I wanted the soil to go and pouring the soil down the tube.
It worked pretty well, though I had to go in with my fork-on-a-stick to even a couple of bits out. - Add your plants. A top tip here is to work from the outer edge of the bottle to the middle.
As advised by the labels, I’d watered my plants well before the transplant.
I used fork-on-a-stick to dig out a hole in the right place. Knocked as much of the pot’s compost as possible without damage off the plant. Dropped the plant through the bottle neck and then used a combination of fork-on-a-stick and unnaturally-bent-wrist to move and press the plant into position.
I was lucky in this case that the bottle’s neck was wide enough for me to put my forearm through, but at the edges there were definitely things that were easier to do with the tool. - Optional – add a decorative gravel layer.
There were quite a few wide expanses of soil in my bottle that I wanted to cover with gravel to make it look more finished. Especially in this bottle garden where I don’t expect the succulents to rapidly cover the space.
I used the long cardboard tube to tip the gravel into the empty spaces and fork-on-a-stick to rake it into a layer of uniform thickness. - Optional – add other decorative elements.
There was no getting away from doing this by hand. Much easier and a matter of seconds to place my rocks in position. - Cleanup time.
If you’re anything like me the inside and outside of your bottle will be grimed with specks of compost and smears of slurry from the gravel. A damp cloth or kitchen towel should wipe that right off.
I did this one by hand again, though it was awkward around the lower, outer edges of inside. If your bottle is too small to put your hand into, I’m sure you’ll figure out a better way. I can tell you’re the resourceful type.
Step 6: Take pictures and show off on Twitter
Check out my beautiful bottle garden!

My rock formation is not quite Stonehenge, but I think it’s a good start.

Bottle garden chillin’ with Chester, our cheeseplant who I have not yet killed, and the other bottle I got from eBay. Check back in May for another bottle garden post where I fill the other carboy and let you know how the succulents have survived.

D helped. If your definition of the word ‘help’ includes trying to chew my plants, splaying out on the patio behind me so I was in constant fear of stepping backwards onto him, being underfoot when I carried heavy full bottle garden up to the dining room, and showing up to take all the credit in time for this photo.
My hope is that he won’t decide to use it as a holding cell for the unfortunate creatures he brings in as presents/to play with.
One response to “Making a Bottle Garden”
I can’t guess how old you are but still pretty young I would think. I am a Nana in my 70’s and the humour in your article has made me laugh and educated me . I have just taken cuttings from my Tradecantia, [wandering sailor or wandering jew ] put in a jar of water, after about 2-3 weeks they will have roots. I will then plant them in any soil I can find into charity shop wine glasses. Grow fast, look fab, live forever. Water once a week. Look good in used glass jars too.
Keep planting it’s good for the Soul x