
Project Purpose
Contactless payment is awesome, but most miss its true potential. This project is about putting magical payment abilities right into your clothing.
Tap-to-pay is much faster than even paying with cash, and unlike chip’n’pin most places with £5 minimum spend for debit cards don’t apply that minimum to contactless payment.
Despite being faster, most people are still getting their wallets out, getting their card out, making the payment, and putting everything away again. Given that most transactions involve you also carrying away something, e.g. lunch. This dance of the wallet just slows things down.
Enter wearables! This project takes an already pretty cool thing and cranks it up to 11.
Barclays have a contactless payment offering for customers in the UK, which they call the bPay. You don’t need to be a Barclays customer, as you can charge it from any card. It comes in a few different forms, a wrist band, a key fob or a sticker. These are all pretty cool, but for this project you need the wristband.
You can just use the bPay wristband, but it is not that comfortable to wear. In the past we have made nicer versions of the band. But this project is about taking things further and putting the chip right into the clothes we wear.
Initial sketches
As with any project, I find it helpful to sketch out how I think it is going to work, to think through the details of what is required.

In this case sketching helped me realise that my original idea of a full width opening might not hold the chip firmly enough, so I made some changes along the way.
Materials required
I performed this project with a custom top designed just for it, available in our shop

This top is light-weight, but has the long sleeves necessary to put a chip at your wrist. Oh, and it has a hood, because that just seemed to fit the theme…
Obviously it also requires a bPay chip – available from Barclays. Or a similar contactless chip available in your region.
Tools

The tools required for this project are fairly simple:
- Seam ripper – used to cut through existing stitching where we no longer want it.
- Needle – I like one with a big eye because I suck at threading needles.
- Thread of the appropriate colour – I had black on hand. I did think about going with a contrasting colour, but at this point my stitch work isn’t up to that kind of scrutiny.
- Scissors – to cut loose thread ends.
Time
This project takes less than an hour.
Project steps

The cuff turns out to be a perfect size for this project, we picked a point just to the left of the main sleeve seam to locate the chip.

We want to do 3 things.
- Create a new stitch line along the left to prevent the chip sliding around the cuff.
- Unpick about half the stitching that is holding the doubled over edge so that we have room to insert the chip (and remove it again)
- Stitch over any loose ends to avoid threads coming loose.

After the first step you should have a slightly pinched in line of thread running from the cuff seam up to the edge, this creates a chip sized area which is currently sealed on all sides.
The next phase is to carefully remove some of the thread which is running along the bottom holding the folded over piece of cuff.

Work carefully along cutting and removing thread with the seam ripper until you have enough open to fit the chip in along its narrow edge.
Then sew over the remaining seam stitches to avoid any more than you wanted from coming loose. You don’t want the whole cuff to come apart!
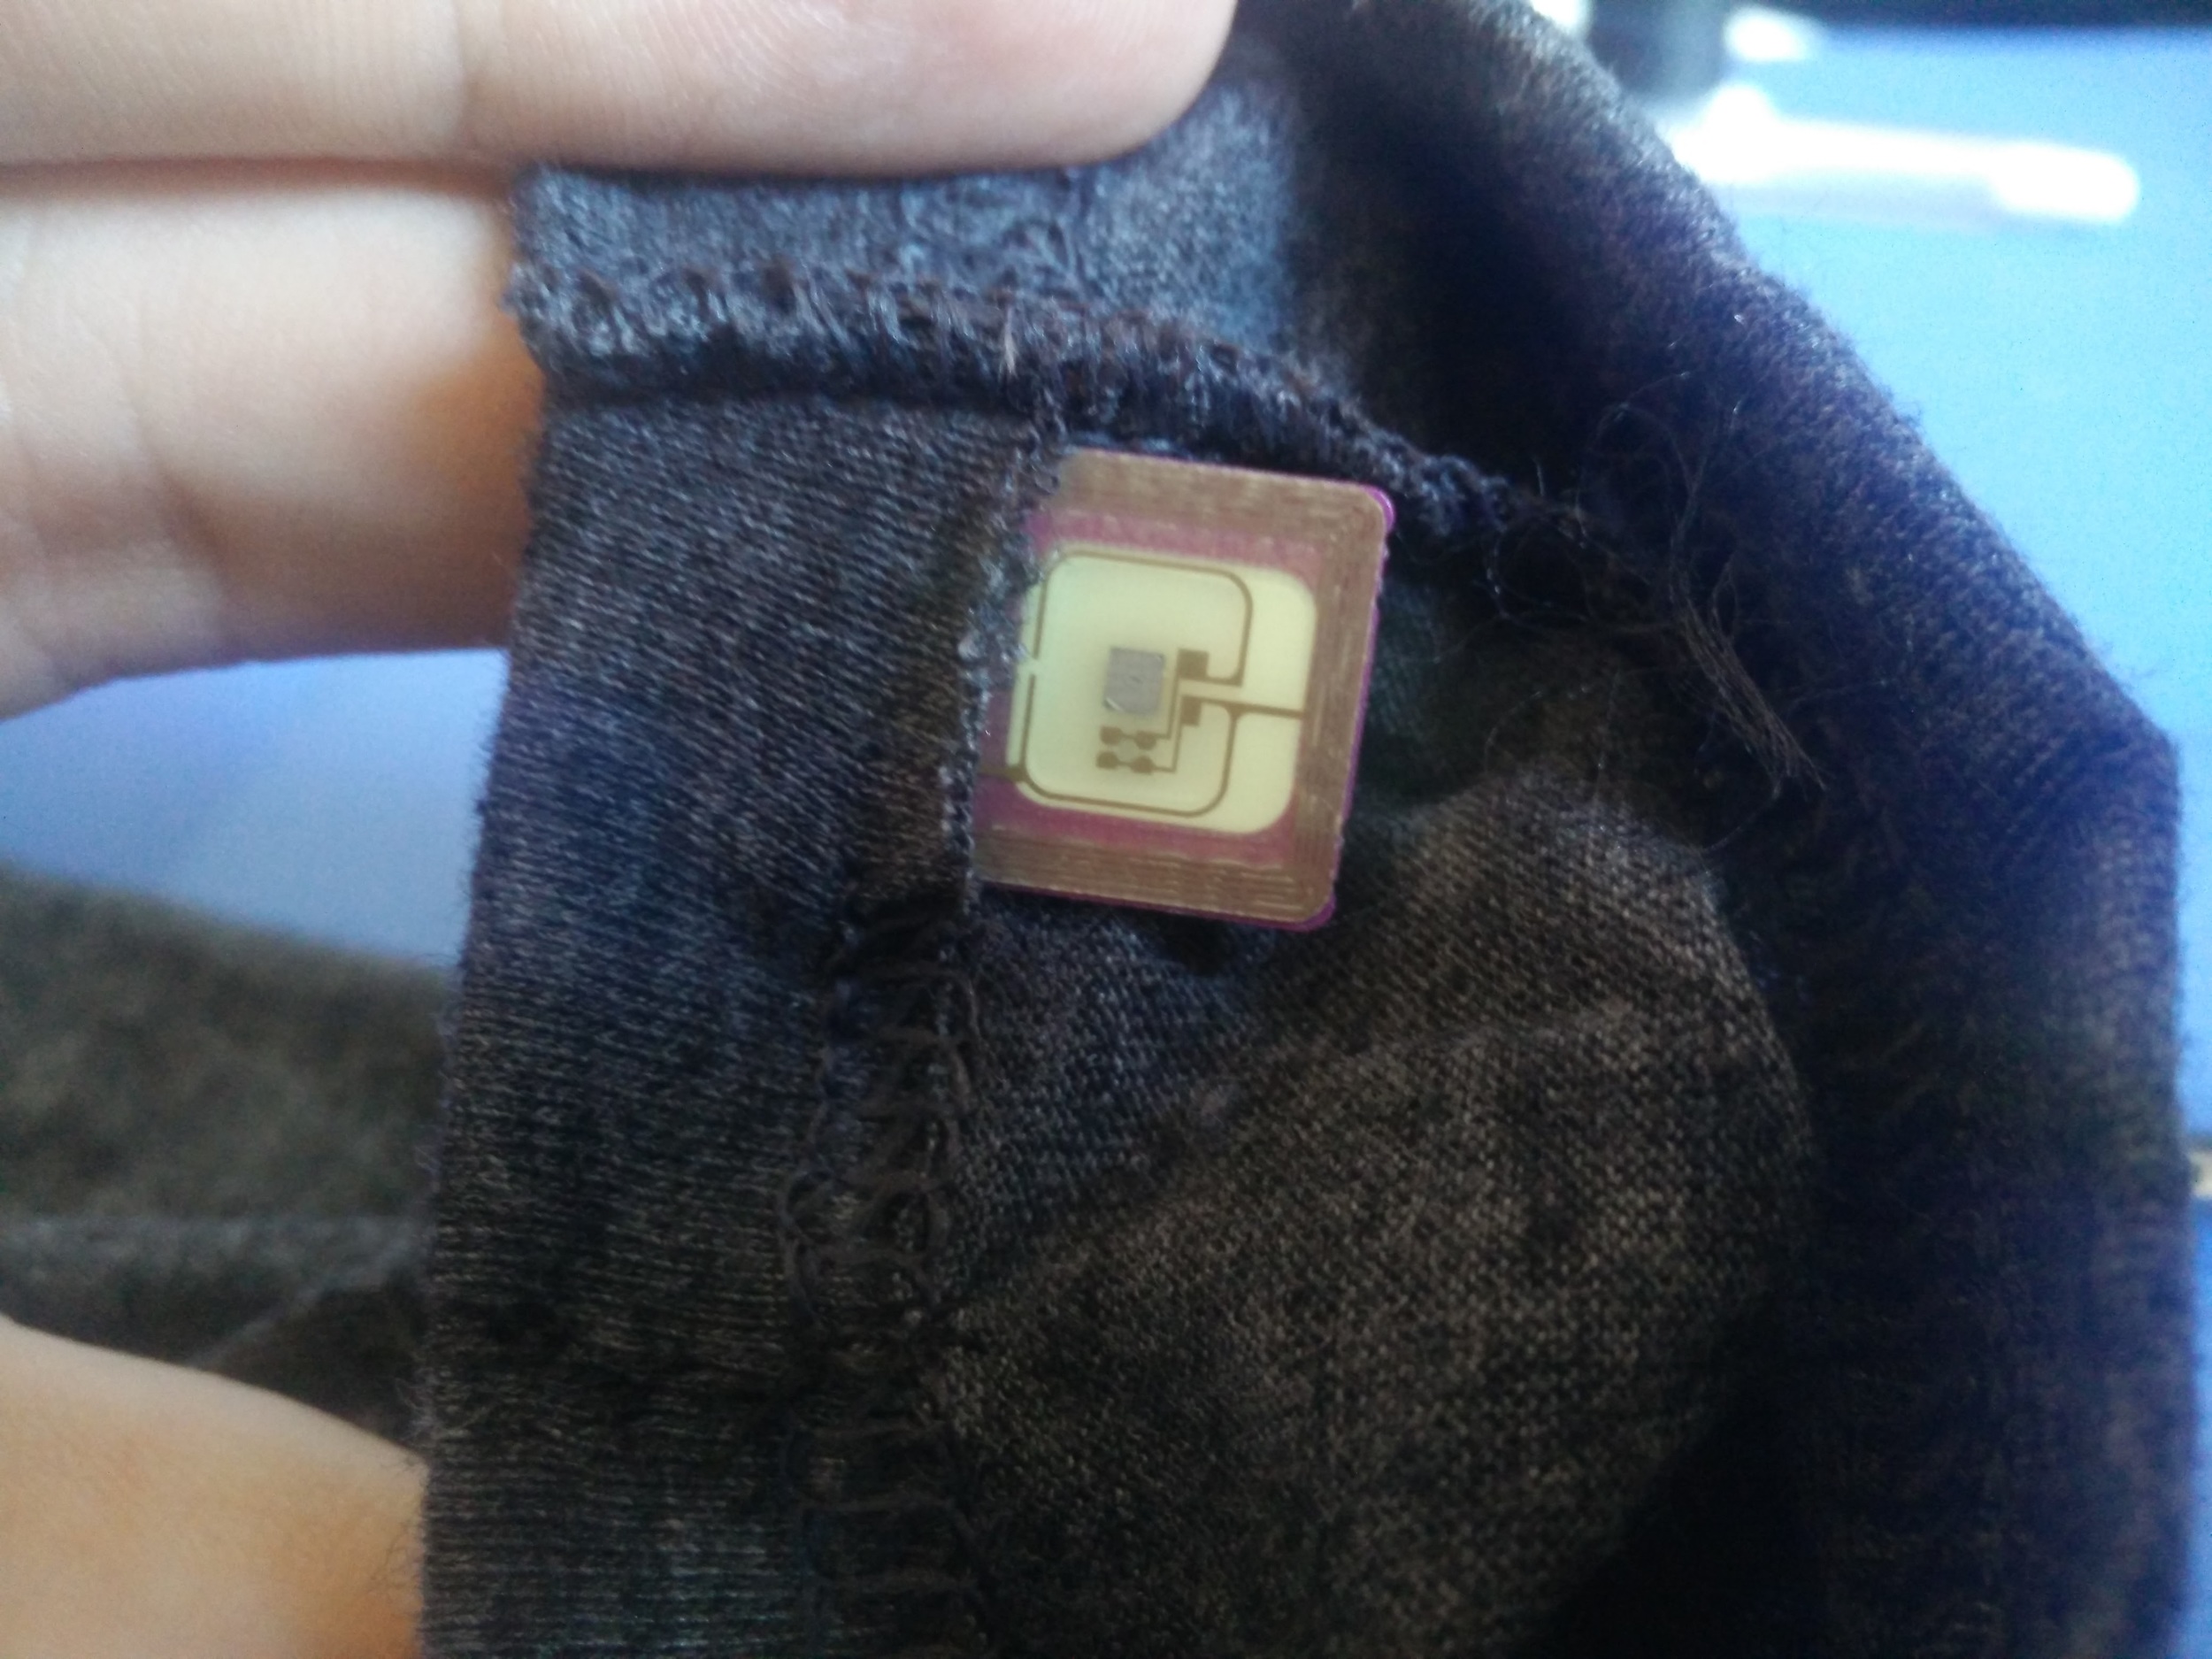
The fabric on our top was sufficiently stretchy that with this opening we could work the chip into place. There it is held securely, but still relatively easy to remove (don’t forget to remove before washing the top)

Above you can just see the corner of the chip now securely held inside the cuff.
From the outside there is a slight bump of the chip corner pressing against the edge of the cuff. We considered tweaking the sewing to give it more room and remove this. However this gives me the confidence that the chip is held firmly, and also a small visual clue that the chip is still in place.

Conclusion
This is a pretty simple project, and having contactless payment on your wrist is really helpful. Though you will occasionally get a few quisical looks, and maybe even some questions about how you did it. Just remember…

You don’t need to see my identification