


Purpose
Become a workshop ninja with all your tools readily accessible and exactly where you need them.
Background
This project was Inspired by tested.com video in which Adam makes a custom tool storage stand as part of his ongoing f-draws initiative 🙂 and also the first darbin orvar podcast in which Linn and Matt discussed organisation and the benefits to being able to see and access your tools in coming up with the best way to achieve a result. It’s no good having the perfect tool if you don’t think of it and worse if the time taken to get it out just puts you off.
Tools
This project used:
- a tenon saw
- marking gauge
- Chisels
- Mallet
- Router
- Pillar drill
- Drill driver
- Clamps
- Chop saw
- Band saw
In truth this is achievable with just the tenon saw,chisels,mallet and a drill. Everything else was a convenience.
Materials
The only thing we bought to do this project were the wheels to make it mobile. Everything else was scavenged from the wood pile. Recently we removed an o!d kitchen and a wall, and installed a new kitchen and new floor. From this we saved all the lumber from the partition wall, and a bunch of oak veneer offcuts from the new kitchen. Also we had a selection of half cut laminate floor boards. We hoard everything… Then feel justified when a project like this is possible with no new material purchased 🙂
Initial sketches
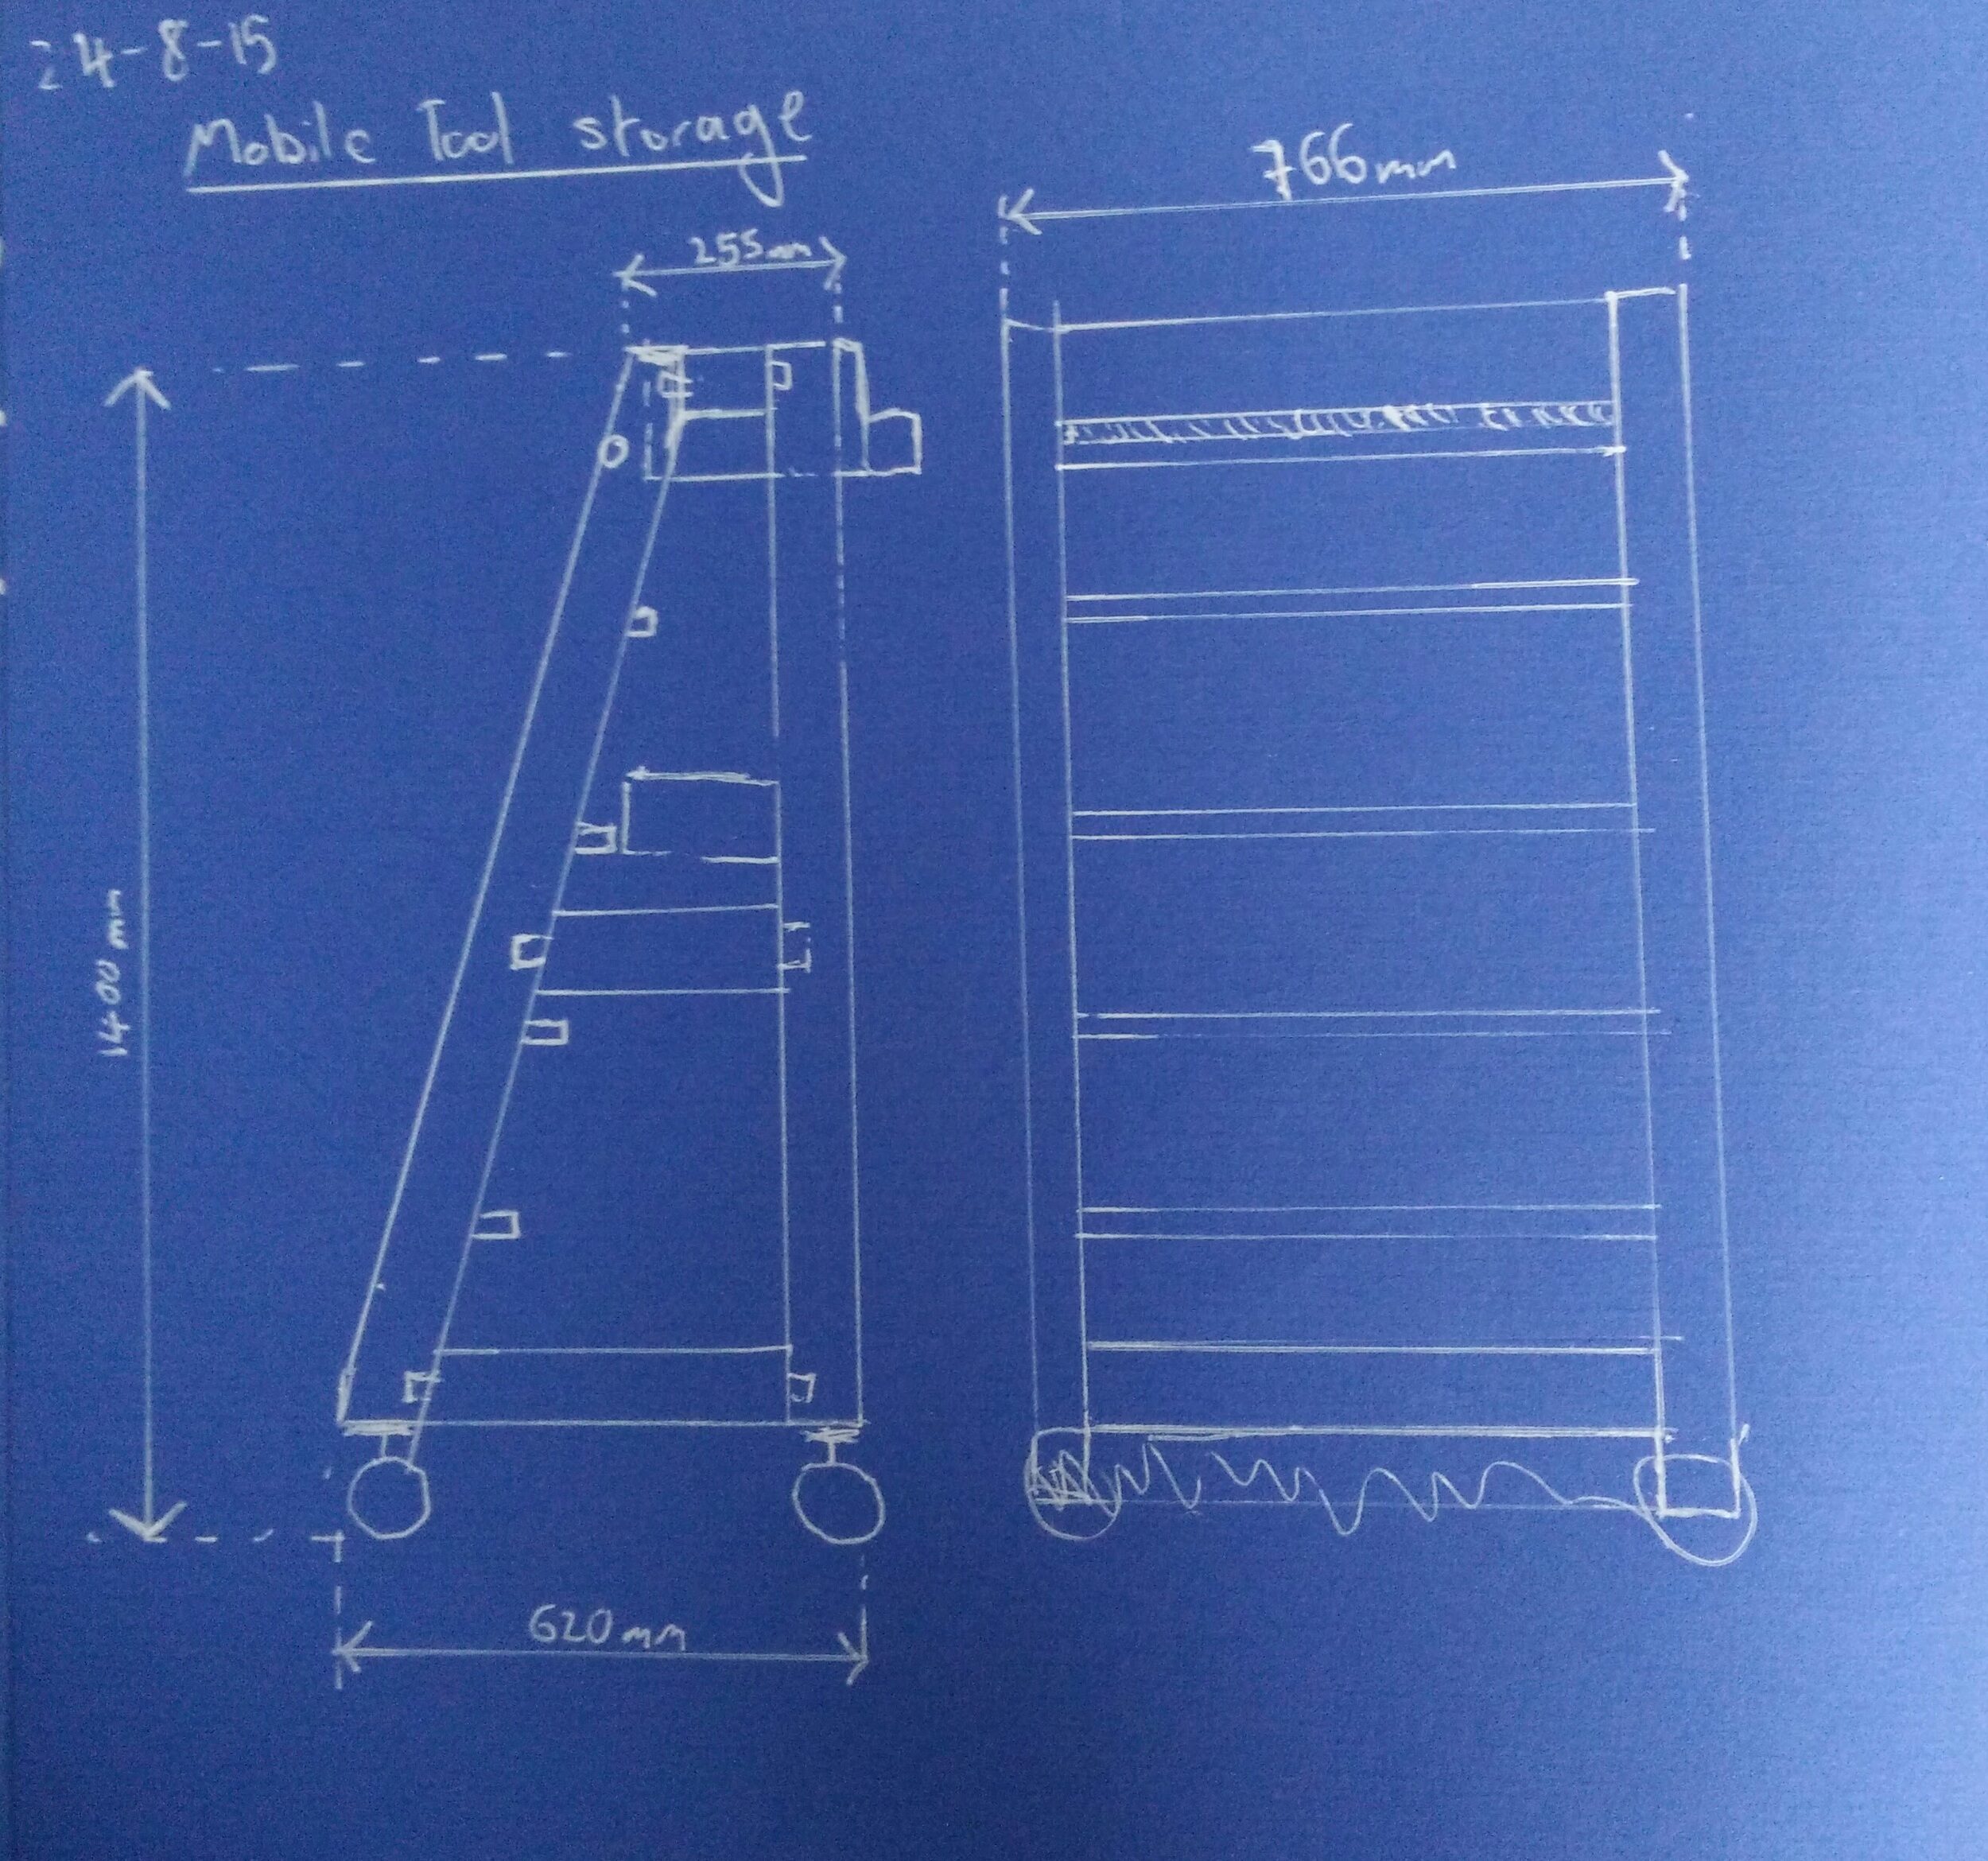
Measurements
Having sketched the basic proportions of the project we need to put some real measurements to it. To achieve this we first decided what height we wanted the resulting structure to be. To achieve a rack that comes to about mid chest height we measured 1400mm. With this measurement we could then come to our drawing and figure out the remaining measurements. In our case having done this we realised the resulting depth would be too much.
So we actually also chose a depth of 500mm and redrew our sketch to see what that would look like. A slightly steeper angle but still fine. We decided to make the depth of the top 200mm, and the width of the rack 500mm so it would be square at the base. This gave us all the measure ents we needed to start cutting.
Construction method
It’s clear that Adam’s version in the tested video has sides cut from plywood sheet stock. But we didn’t have any sheet stock of sufficient dimensions so we decided to make the two sides from the 2×4’s we reclaimed from a partition wall. Since we would need to construct the ends as frames rather than a one piece, we went with mortice and tenon joints to give a robust connection.
For the shelves we copied Adam’s approach and routed slots at intervals down the sides so that we could simply slide shelves into place.
To make the rear storage for cutting blades we decided to glue & screw some sections of laminate onto a board wide enough to slide into a shelf position.
By using the routed slots for shelves, and not hard fixing any of them in place we allow for evolution of the rack. Any shelf can be removed/moved if we decide it works better in a different place or if we want to upgrade in the future.
Steps

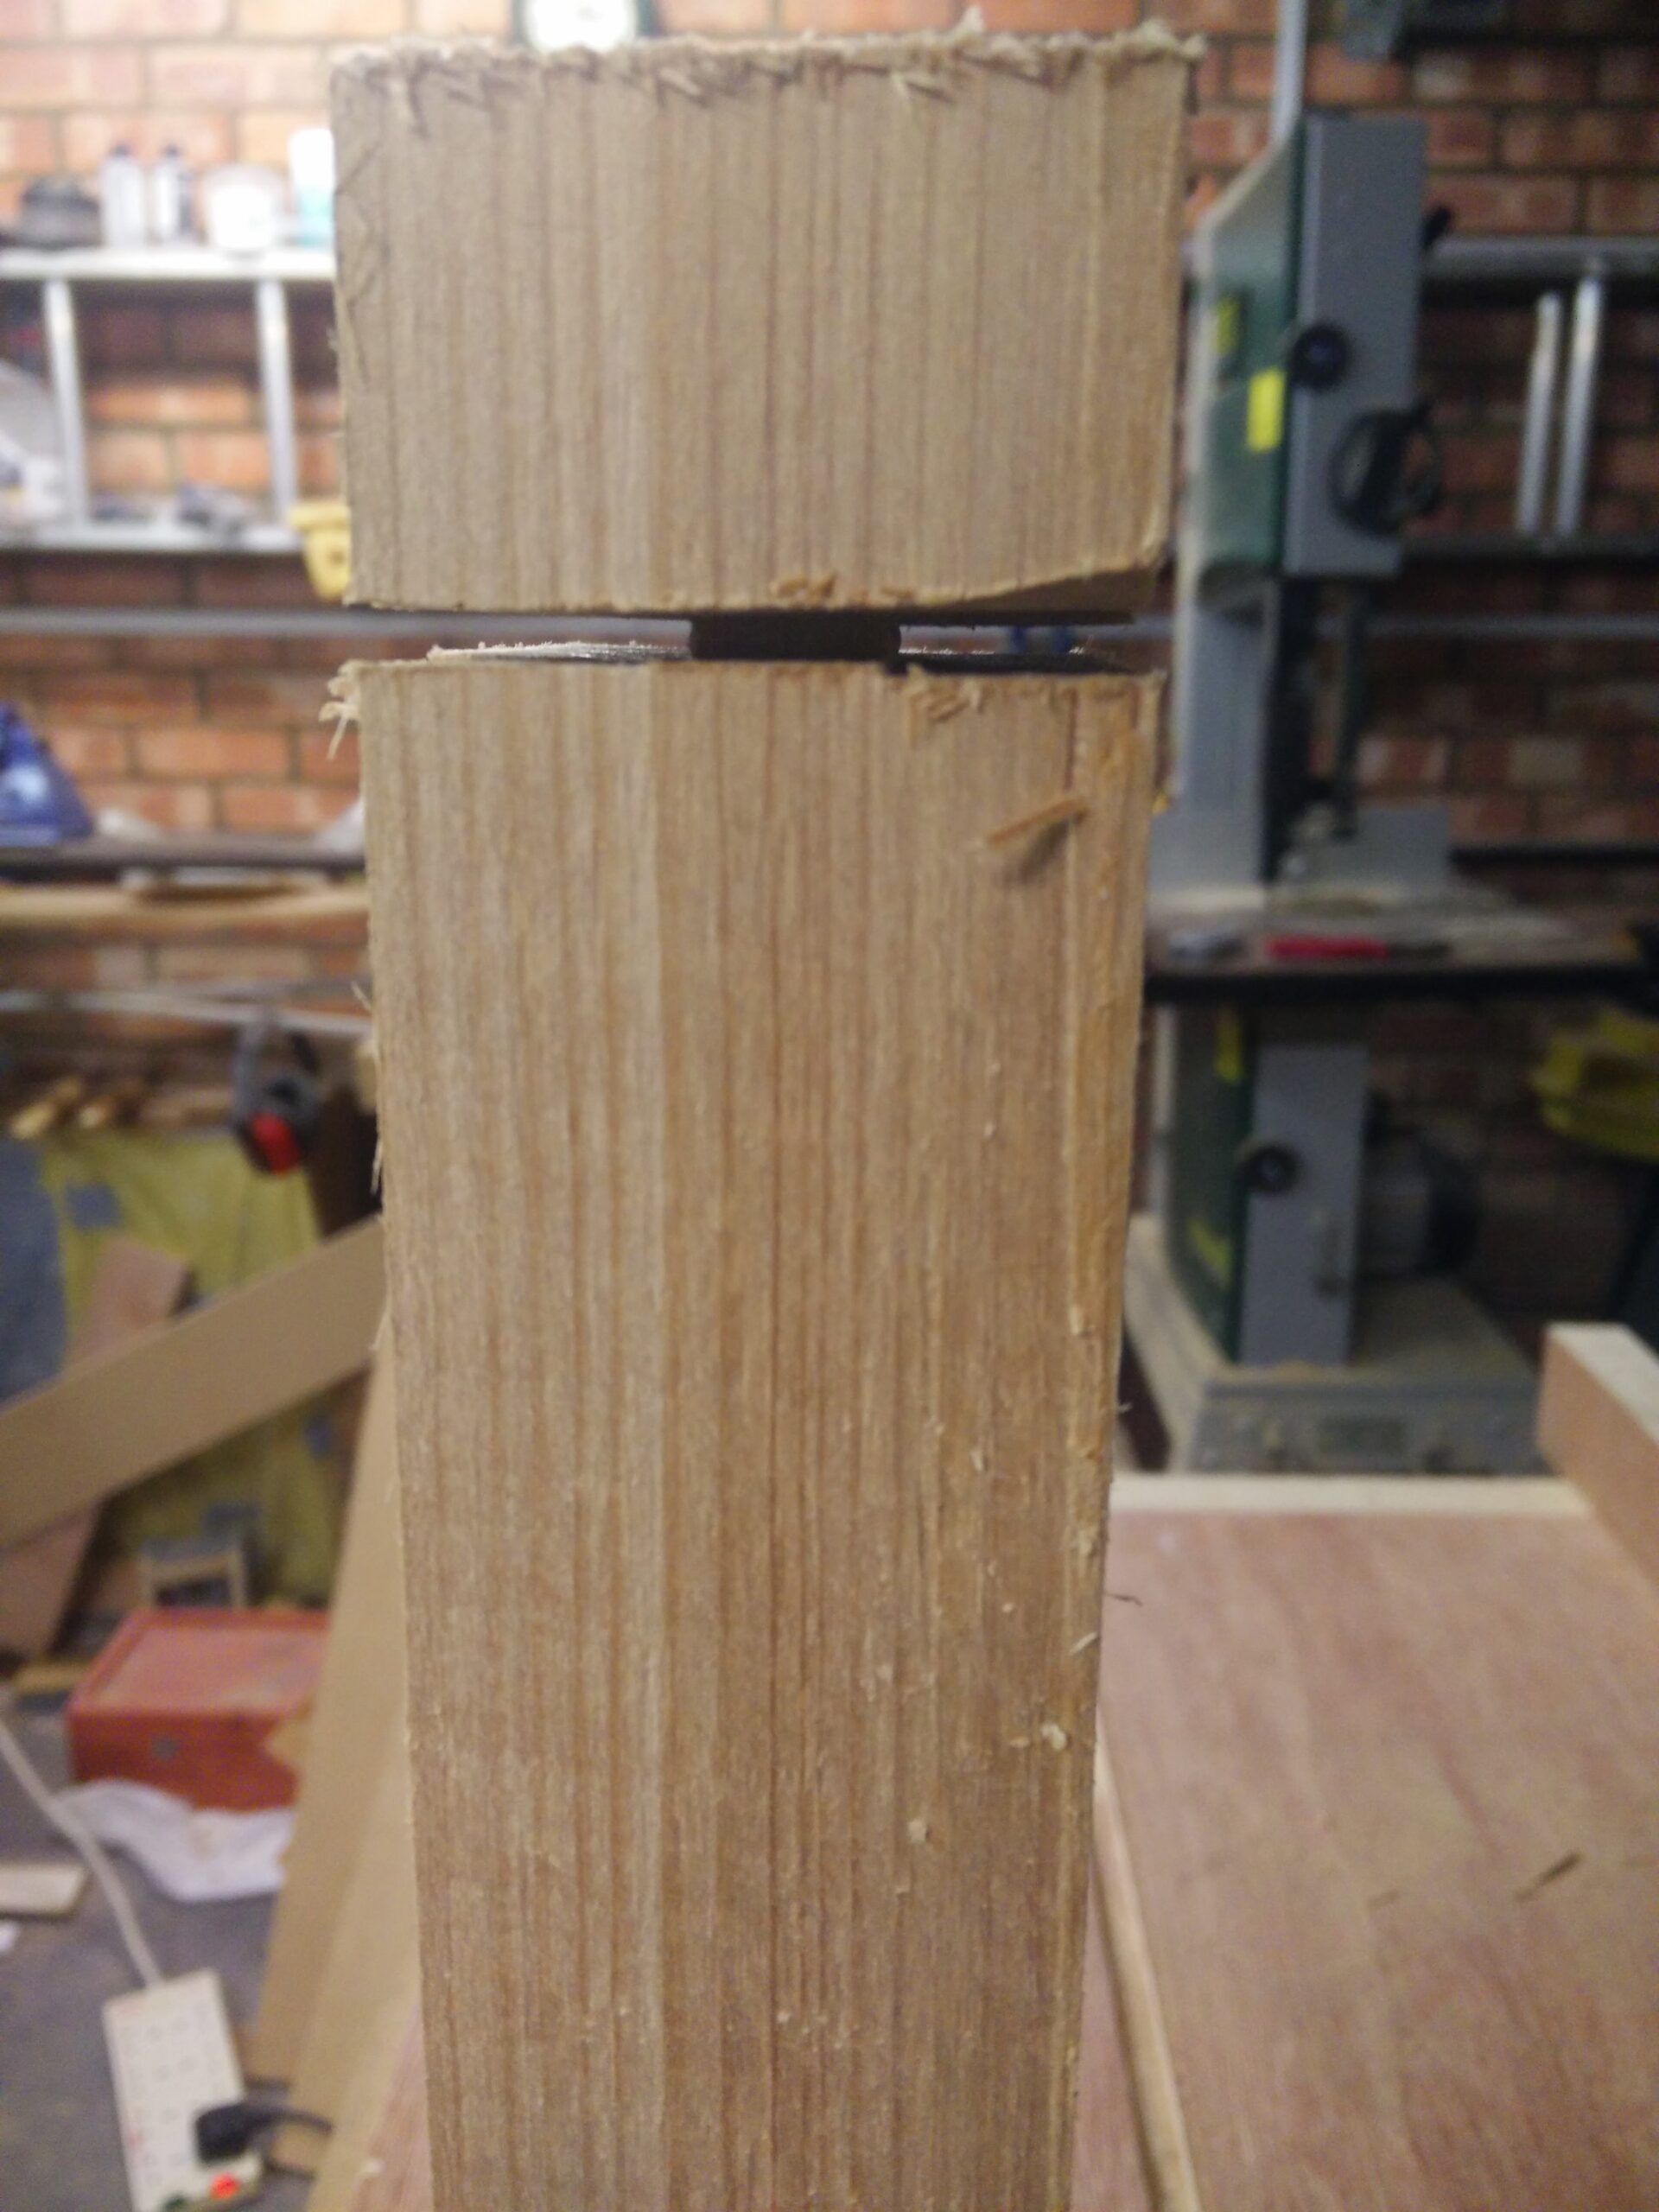
Nice smooth finish from a plane
Since we were using rough sawn lumber, our firsts step was to plane it smooth, or at least smoother…
It should be obvious which is which 🙂
Then we cut things to our required lengths, being careful to add the length required for a tenon at either end of the cross members.
here I’ve cut all the way around the shoulder of a tenon.
I cut the tenons first and used them to mark out the mortice slots. I then chiselled out the mortices.
We first fit the cross members to the straight back piece so that we could measure the sloping front piece against what had been done so far.
If this was to be a piece of furniture, we would have done the calculations to mark all the exact angles. However for a rough and ready tool rack for the workshop it was fine to rough things as we went along.


With the two solid end frames constructed, I just needed to set the width and attach a bottom piece, and some wheels to complete the substructure to support all the custom storage.
Here is a video of some of the build stages. Also a quick shout out to Matthias Wandel who inspired me to quickly sharpen up my bandsaw blade whilst I was working on this,
The structure holds a series of shelves down the sloping front. The shelf spacing is set so that the centre of one shelf will line up behind the shelf below it. So that any tools placed there should not interfere with the shelf below.
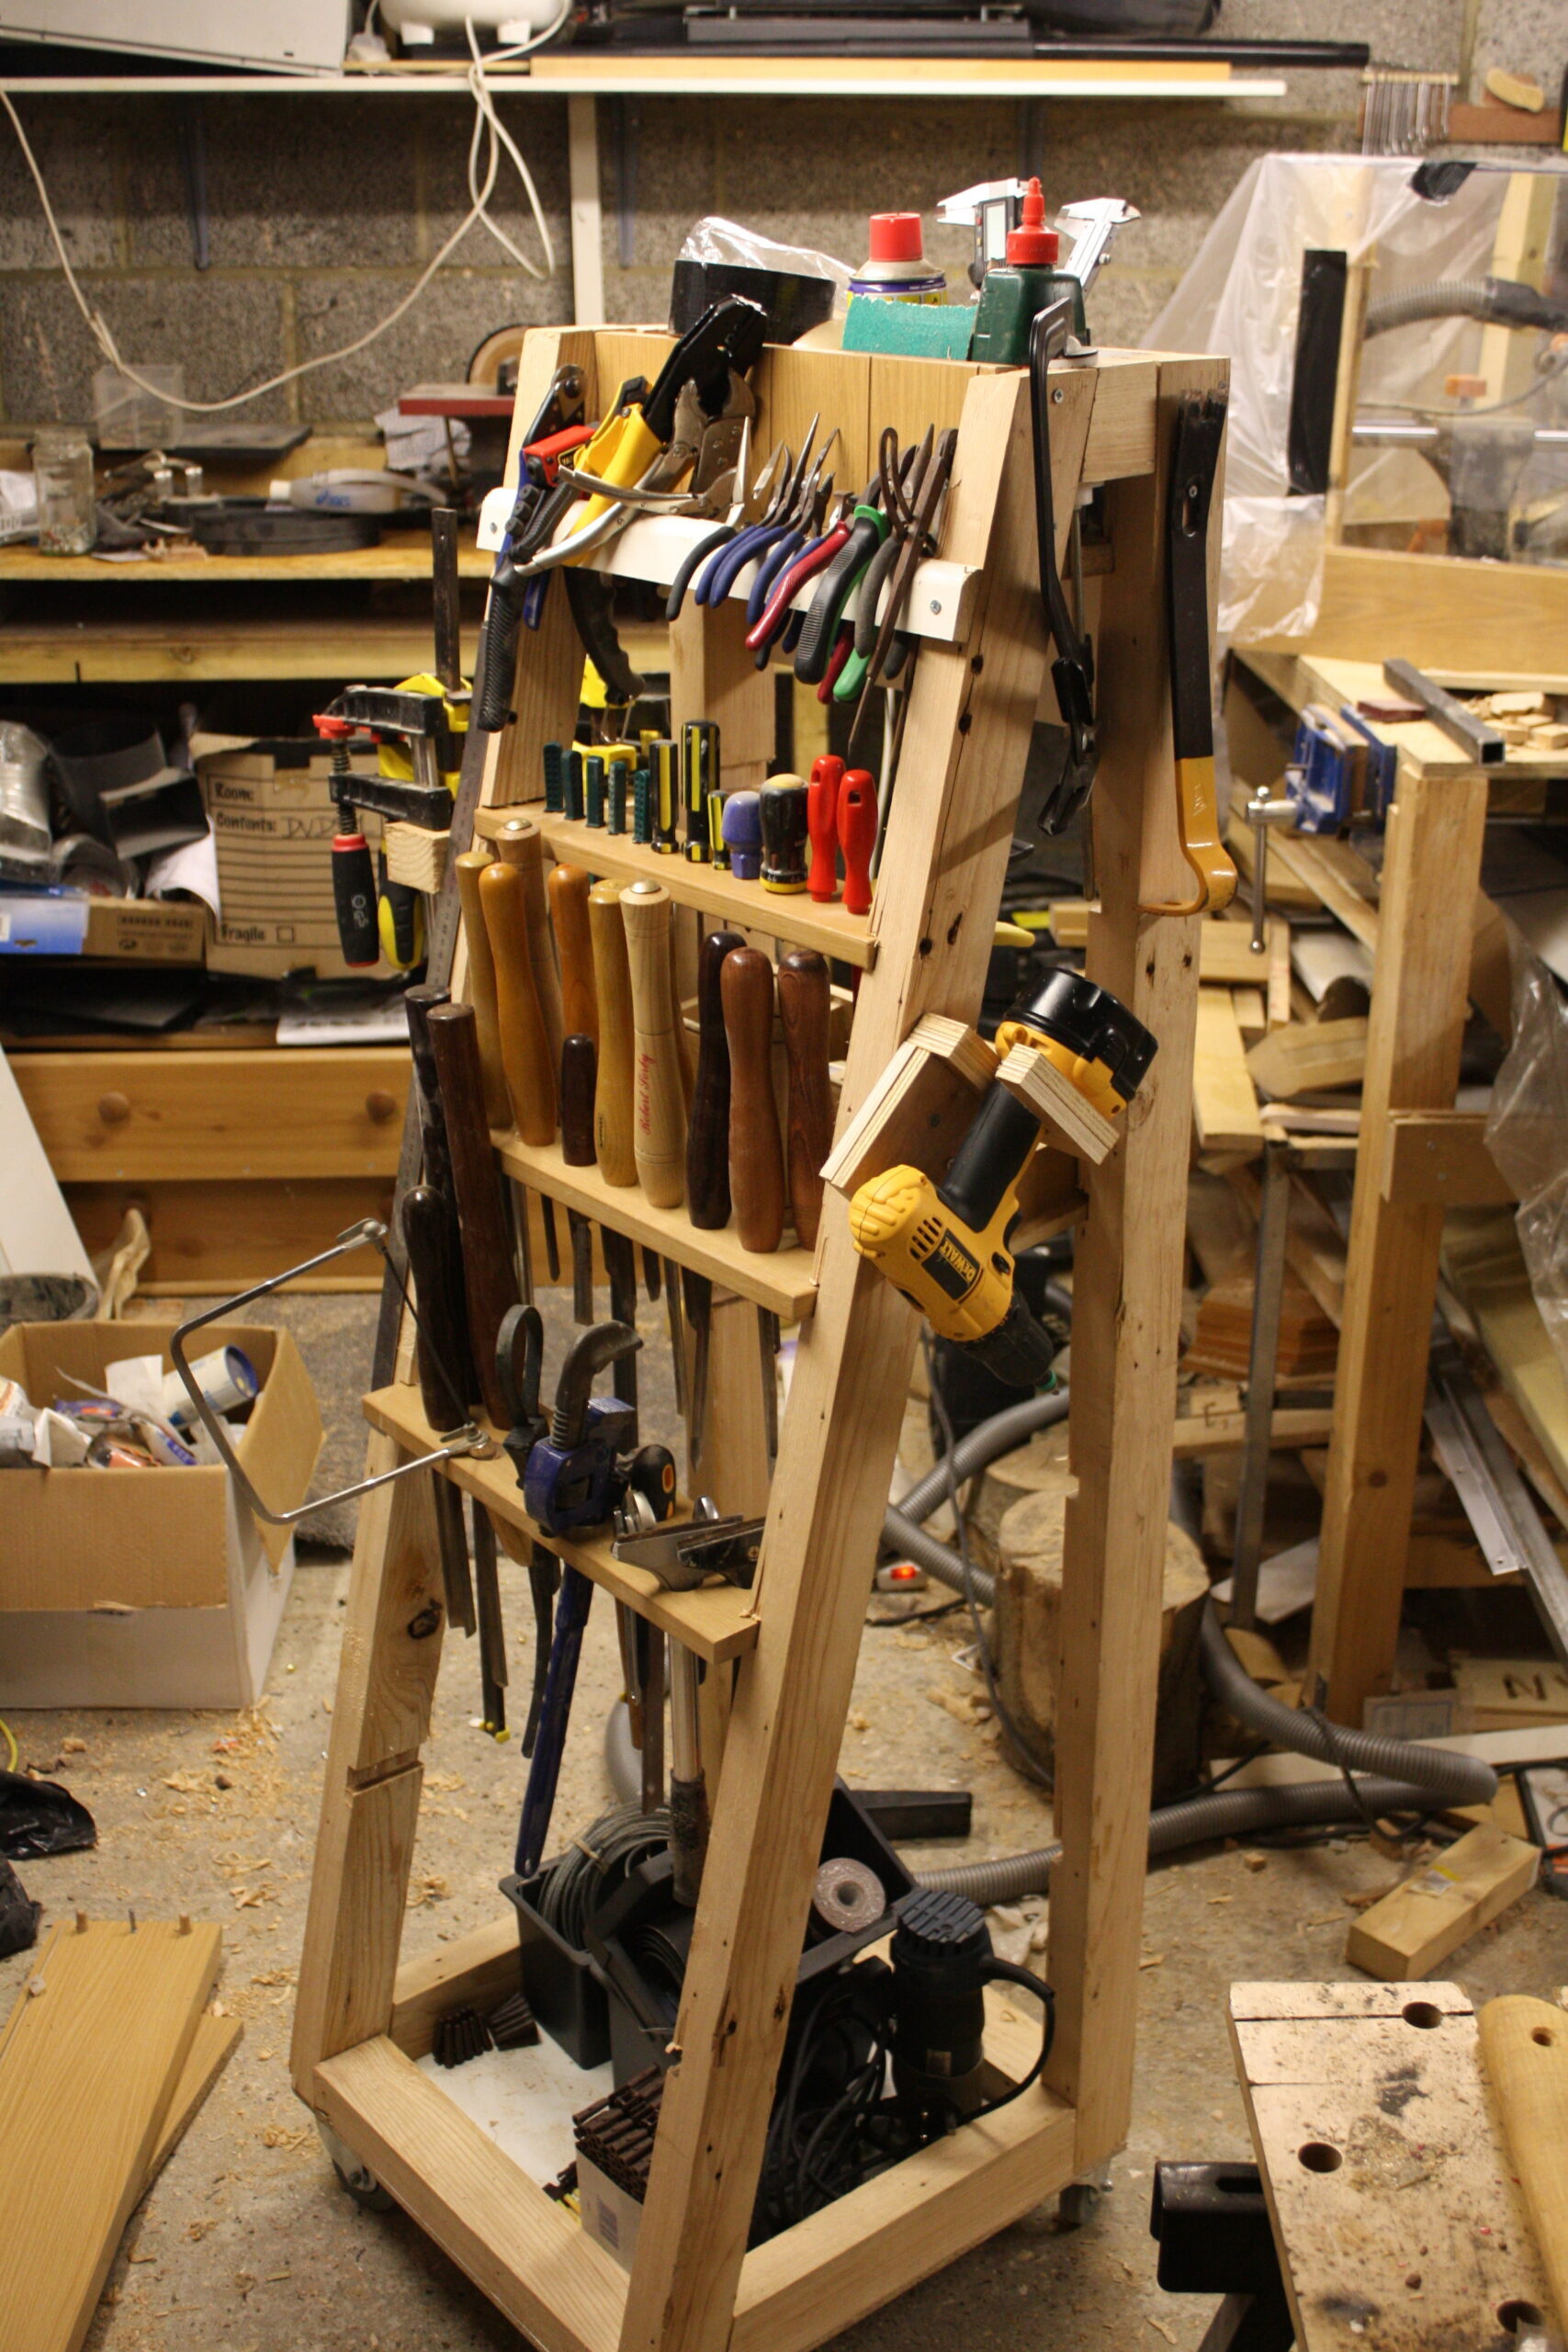
Note that at the top there is a ‘rail’ actually a piece of architrave from what used to be a kitchen door frame. This rail sits in front of the top storage bucket such that the items places on this rail can lean back against that for stability. This means a more flexible storage for pliers and such without having individually drilled holes for each.

They thought I was crazy asking for more clamps…
Each shelf in the above picture simply has a series of holes drilled along the length. Each shelf has the same size hole all the way along, which tends to group tools by size rather than necessarily tool type, this may not work out over time, but the shelves are not fixed, so can easily be removed and replaced as necessary. Also they are easily reordered as time and usage dictates.
For storage at the rear, this design copies Adam’s. We took some scrap laminate flooring and cut one length to the standard shelf length so that it will slot in to our groves. Then we cut a set of dividers, a front and a back and clamped the whole lot up with some wood glue. Then added some screws for good measure. The photo above shows why you can never have too many clamps.

Rear storage for box cutters/craft knives, multi tools etc

Speaking of clamps, in reviewing the design we came across a few suggestions that a nice way to store F clamps is in a comb rack, so we went ahead and added one to the side of our structure. A relatively short section accommodates 12 clamps in a convenient way. Warning – 12 clamps are pretty heavy and on one side so the rest of the cart needs to be loaded to avoid it tipping over.
Taking advantage of the beefier frame that our 2×4’s provide, we also added mount points for a steel rule down the front, and a pry bar on the other side. As well as a mount for our drill driver which is handy to keep in easy reach.
The drill driver mount is just a couple of pieces of ply screwed at right angles and screwed to the frame. The angle was achieved by letting the drill hang the way it naturally wanted and marking that point.


Just to finish up, here are a load more pictures. Something like this will never really be ‘finished’ but it is now officially at version 1.0


Conclusion
This is a great little workshop project, and is easily customisable to your particular requirements. Keeping tools out and ready for use is already making a difference to our workshop experience. Once you have the core structure in place, with a few principles for modularity, it is very easy to add/remove and change as your requirements evolve.